Introduction
Here is my journey of the Lily58 keyboard I built using a DIY soldering kit. Perhaps, this post will lead you to debate over your current keyboard choice, or even inspire you to purchase (or build) a more niche keyboard layout!
Lily58 is a keyboard layout that’s slightly different from the traditional keyboards we’re used to; while it retains the standard QWERTY keys, there are differences in design that create a fully-functional keyboard with just 58 keys. It results in less travel, smaller keyboard footprint, better typing ergonomics, and eventually better accuracy/speed.
Final Build
Why
Ergonomics
The keyboard features an ortholinear layout. Historically, keyboards have had a staggered layout inherited from typewriters to prevent jams, but this layout does not focus on the way in which our fingers sit on the keyboard. It’s highly debated, but I now prefer the ortholinear layout since the finger movements are overall more consistent between any needed key press. You can also go with a sofle, corne, helix, etc.
The split nature of the keyboard allows you to place your shoulders apart, which is a more natural typing position.
Intentionality
A traditional keyboard might have 108 keys, many of which go unused, forgotten, or sit as a novelty trophy (Scroll Lock, anyone?). It’s the mainstream choice we succumb to because it’s ubiquitous. Perhaps trying another layout will lead you to a more compact layout that suits your daily uses better, and you get to say you deliberately chose something that works for you instead of a solution that “just works”.
Customization
You might love the lily58 layout, or you might question my sanity for it; regardless, you can make a custom layout for yourself, centered around you: whether you program, browse the web, write essays, or all of the above.
You may find yourself considering layouts with a small touchpad near the typing area, wrist rests, and other niceties.
Sizing
The Lily58 layout is aptly named, proposing a 58-key layout. Coming from a full-size keyboard, we lose the NumPad, the F-row/media keys, some editing keys, and even the beloved arrow keys.
What keys are even left? Where did our functionality go?!
Layers, layers.
We’ve already gotten used to them without knowing! Just as the Shift key gives us a layer for some basic ASCII symbols (!@#$%^&*() etc.), we can move the F-row, media keys, arrows, and any other key to “upper” and “lower” layers. This allows a huge number of possible layouts, yet leaves room to be overwhelmed with choices.
At the end of the day, it ends up being a more compact keyboard your desk.
Why not?
For some, the learning curve can feel too steep, and some may be only looking for the result, not the process of building. Custom/niche builds are also more pricey than traditional/mainstream keyboards, as they are less mass-produced.
How
There are two ways of acquiring these precision-made instruments: prebuilt, or handmade/DIY.
Prebuilt
Of course, you can purchase a Lily58 pre-assembled.
DIY
Parts
If you decide to build one for yourself, however, you’ll end up with a smaller hole in your pocket, learn the (shockingly simple) internals of a keyboard, and possibly find pleasure in building something from scratch!
You’ll need:
- A DIY kit such as beekeeb’s kit one
- Key caps, such as this blank set, or configured/added to the kit above
- Key switches, such as these silent ones (you’ll need 2x, one for each side). You’ll need to match your switch type (MX, as opposed low-profile to choc, unless you want to go that route).
- Optionally, a case added to your kit, or you 3D one yourself. The keyboard will work without it, but will certainly look a bit more complete with a case, and it’ll slide around less with some rubber feet (which you’ll find in your beekeeb kit).
- A soldering iron
- A 3D printer, if you’re printing a case/key cap frame yourself.
The key perk here is you get a choice of key cap color, material, and feel, as well as custom mechanical switches (clicky, tactile, silent, linear, etc.)
Just make sure you match your PCB board switch type to the switches you get (MX vs choc low-profile vs others…). Make sure your key caps cover 56 square caps, as well as 2 1.5x-length for space/enter.
My Choices
I went with sets of linear, silent mechanical switches, linked in the previous section. In my experience, they’ve delivered on being quiet, though I’m no professional on the different kinds of switches.
I liked the challenge of learning a new layout while having blank key caps, as well as the plain look of the keyboard. If this isn’t for you, you can add lettered keys to be included in your kit.
Cost
As of this writing, my spending was, shipping and tax included:
- $71 for DIY keyboard kit
- $27 for switches
- $16 for key caps
- $0 for a borrowed soldering iron
- and $1-2 in provided ABS material with a provided 3D printer
- $15 for soldering my first set of microcontrollers upside down, and frying one of them 😊
Here is everything you should need, 3d printing aside:
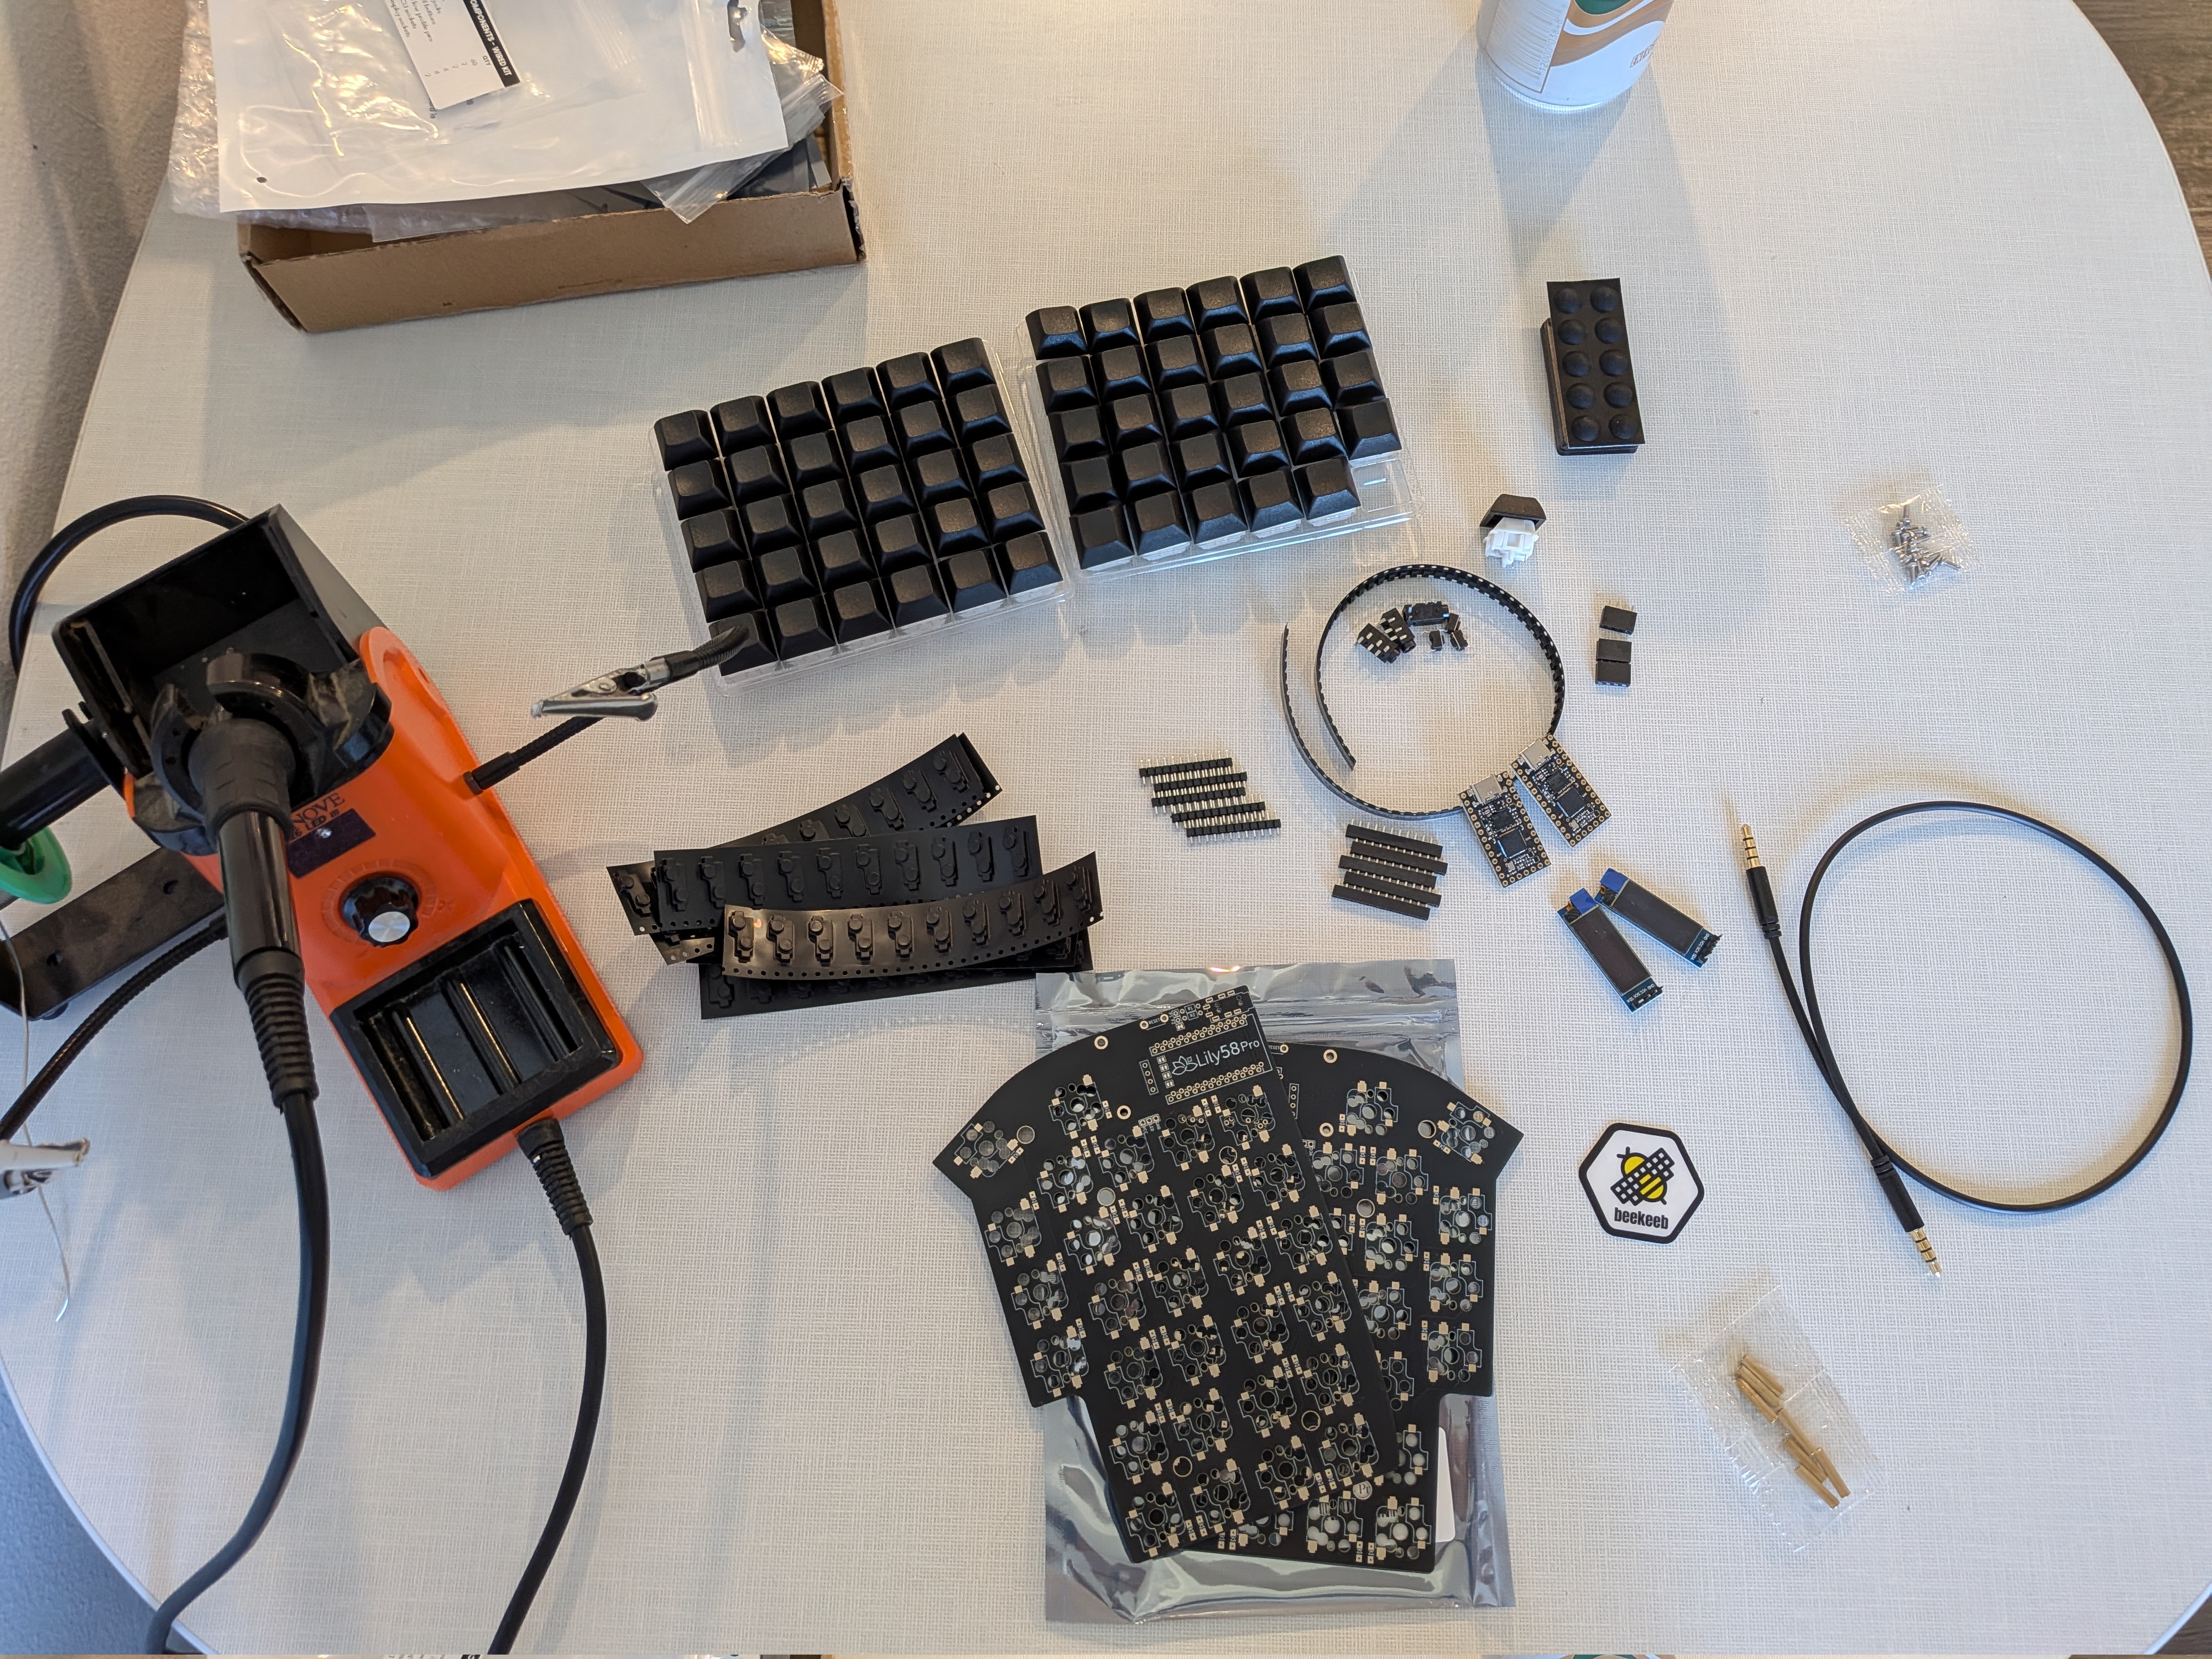
Mise en place
…coming to a total of about $130.
Assembly/Build
In order to not reinvent the wheel, the guide I used to build the keyboard is provided here, matching the provided materials from the kit:
The 3D print files I used are:
- https://www.thingiverse.com/thing:4969364 (switch holes)
- https://www.thingiverse.com/thing:4601644 (tentable case)
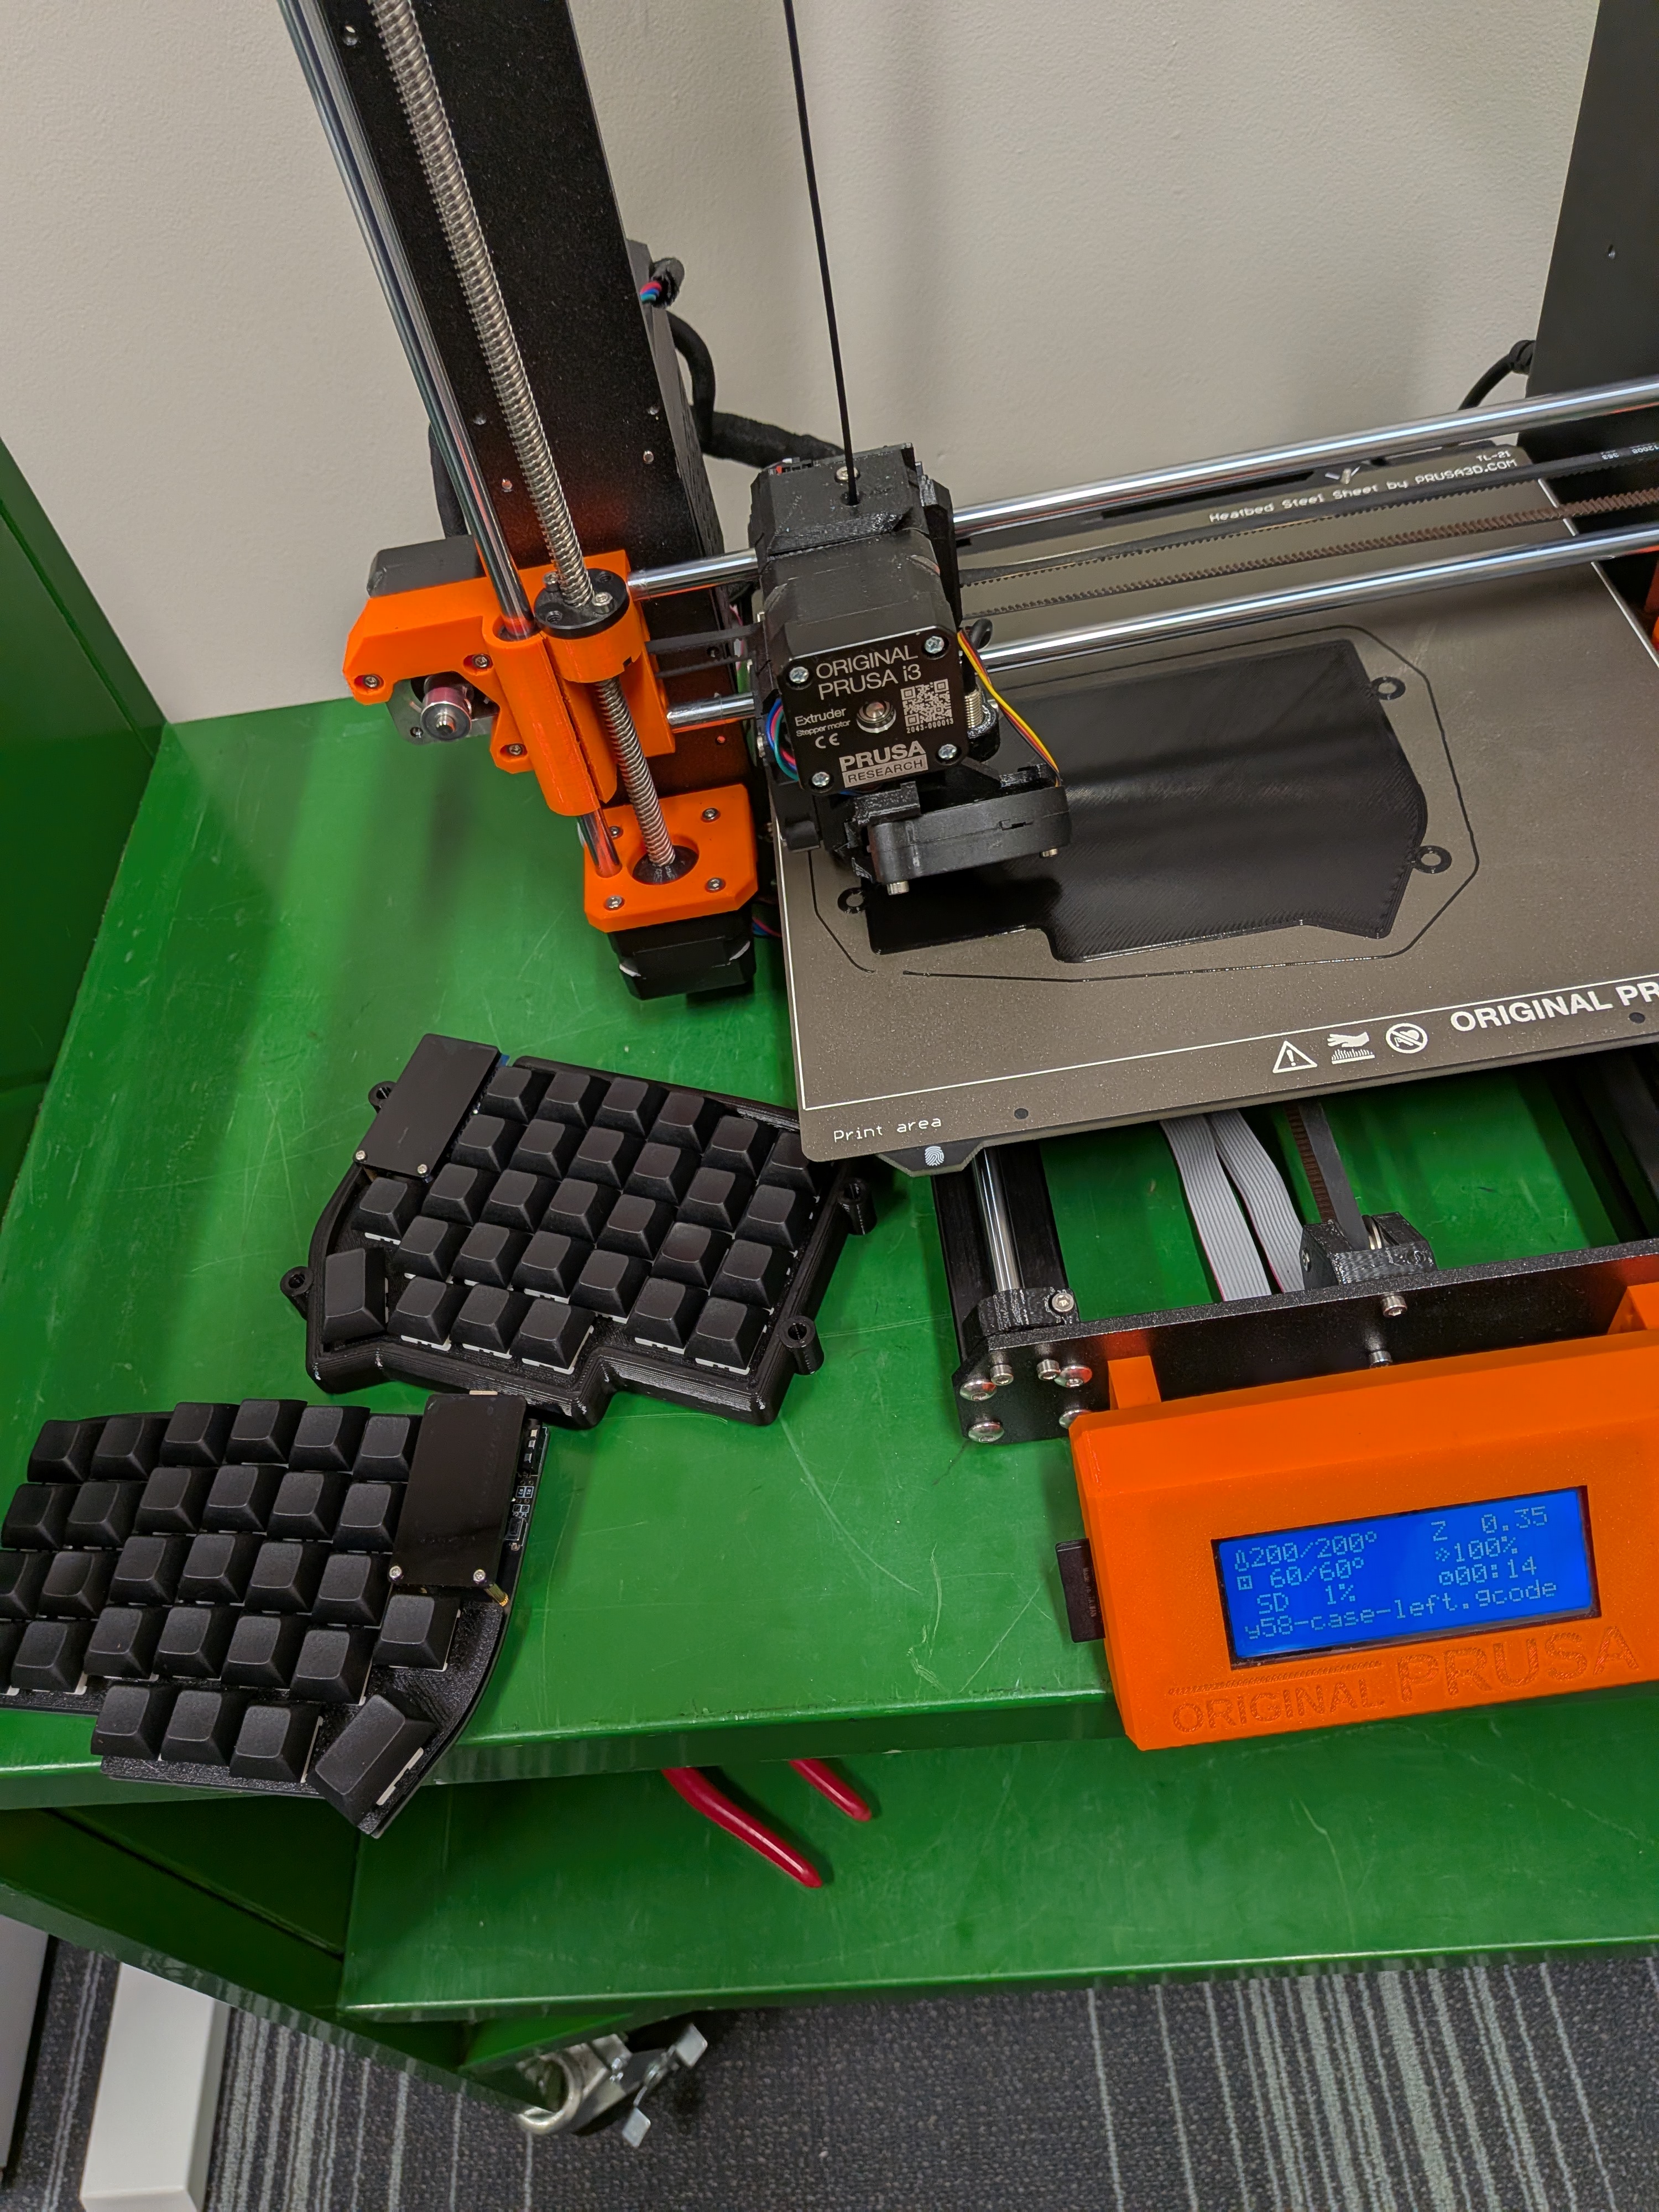
3D Printing Process
My tips coming from experience!
- Learn the soldering technique beforehand. It’ll speed the process up
- Be careful with PCB orientation: they are reversible, you don’t want to build two right sides of the keyboard on accident.
- The diodes are not reversible! See the guide for correct orientation.
- The Pro Micro/Sea Picro controllers face down, not up (see pictures in the build guide). They will not work if reversed; you’ll have to resolder or order replacements if you make a mistake.
The basic steps above may seem obvious, though taking care of the simple things will save you hours of troubleshooting and re-soldering (ask me how I know!).
For flashing the keyboard, I used QMK, which has a great guide on steps to flash your controllers after your assembly.
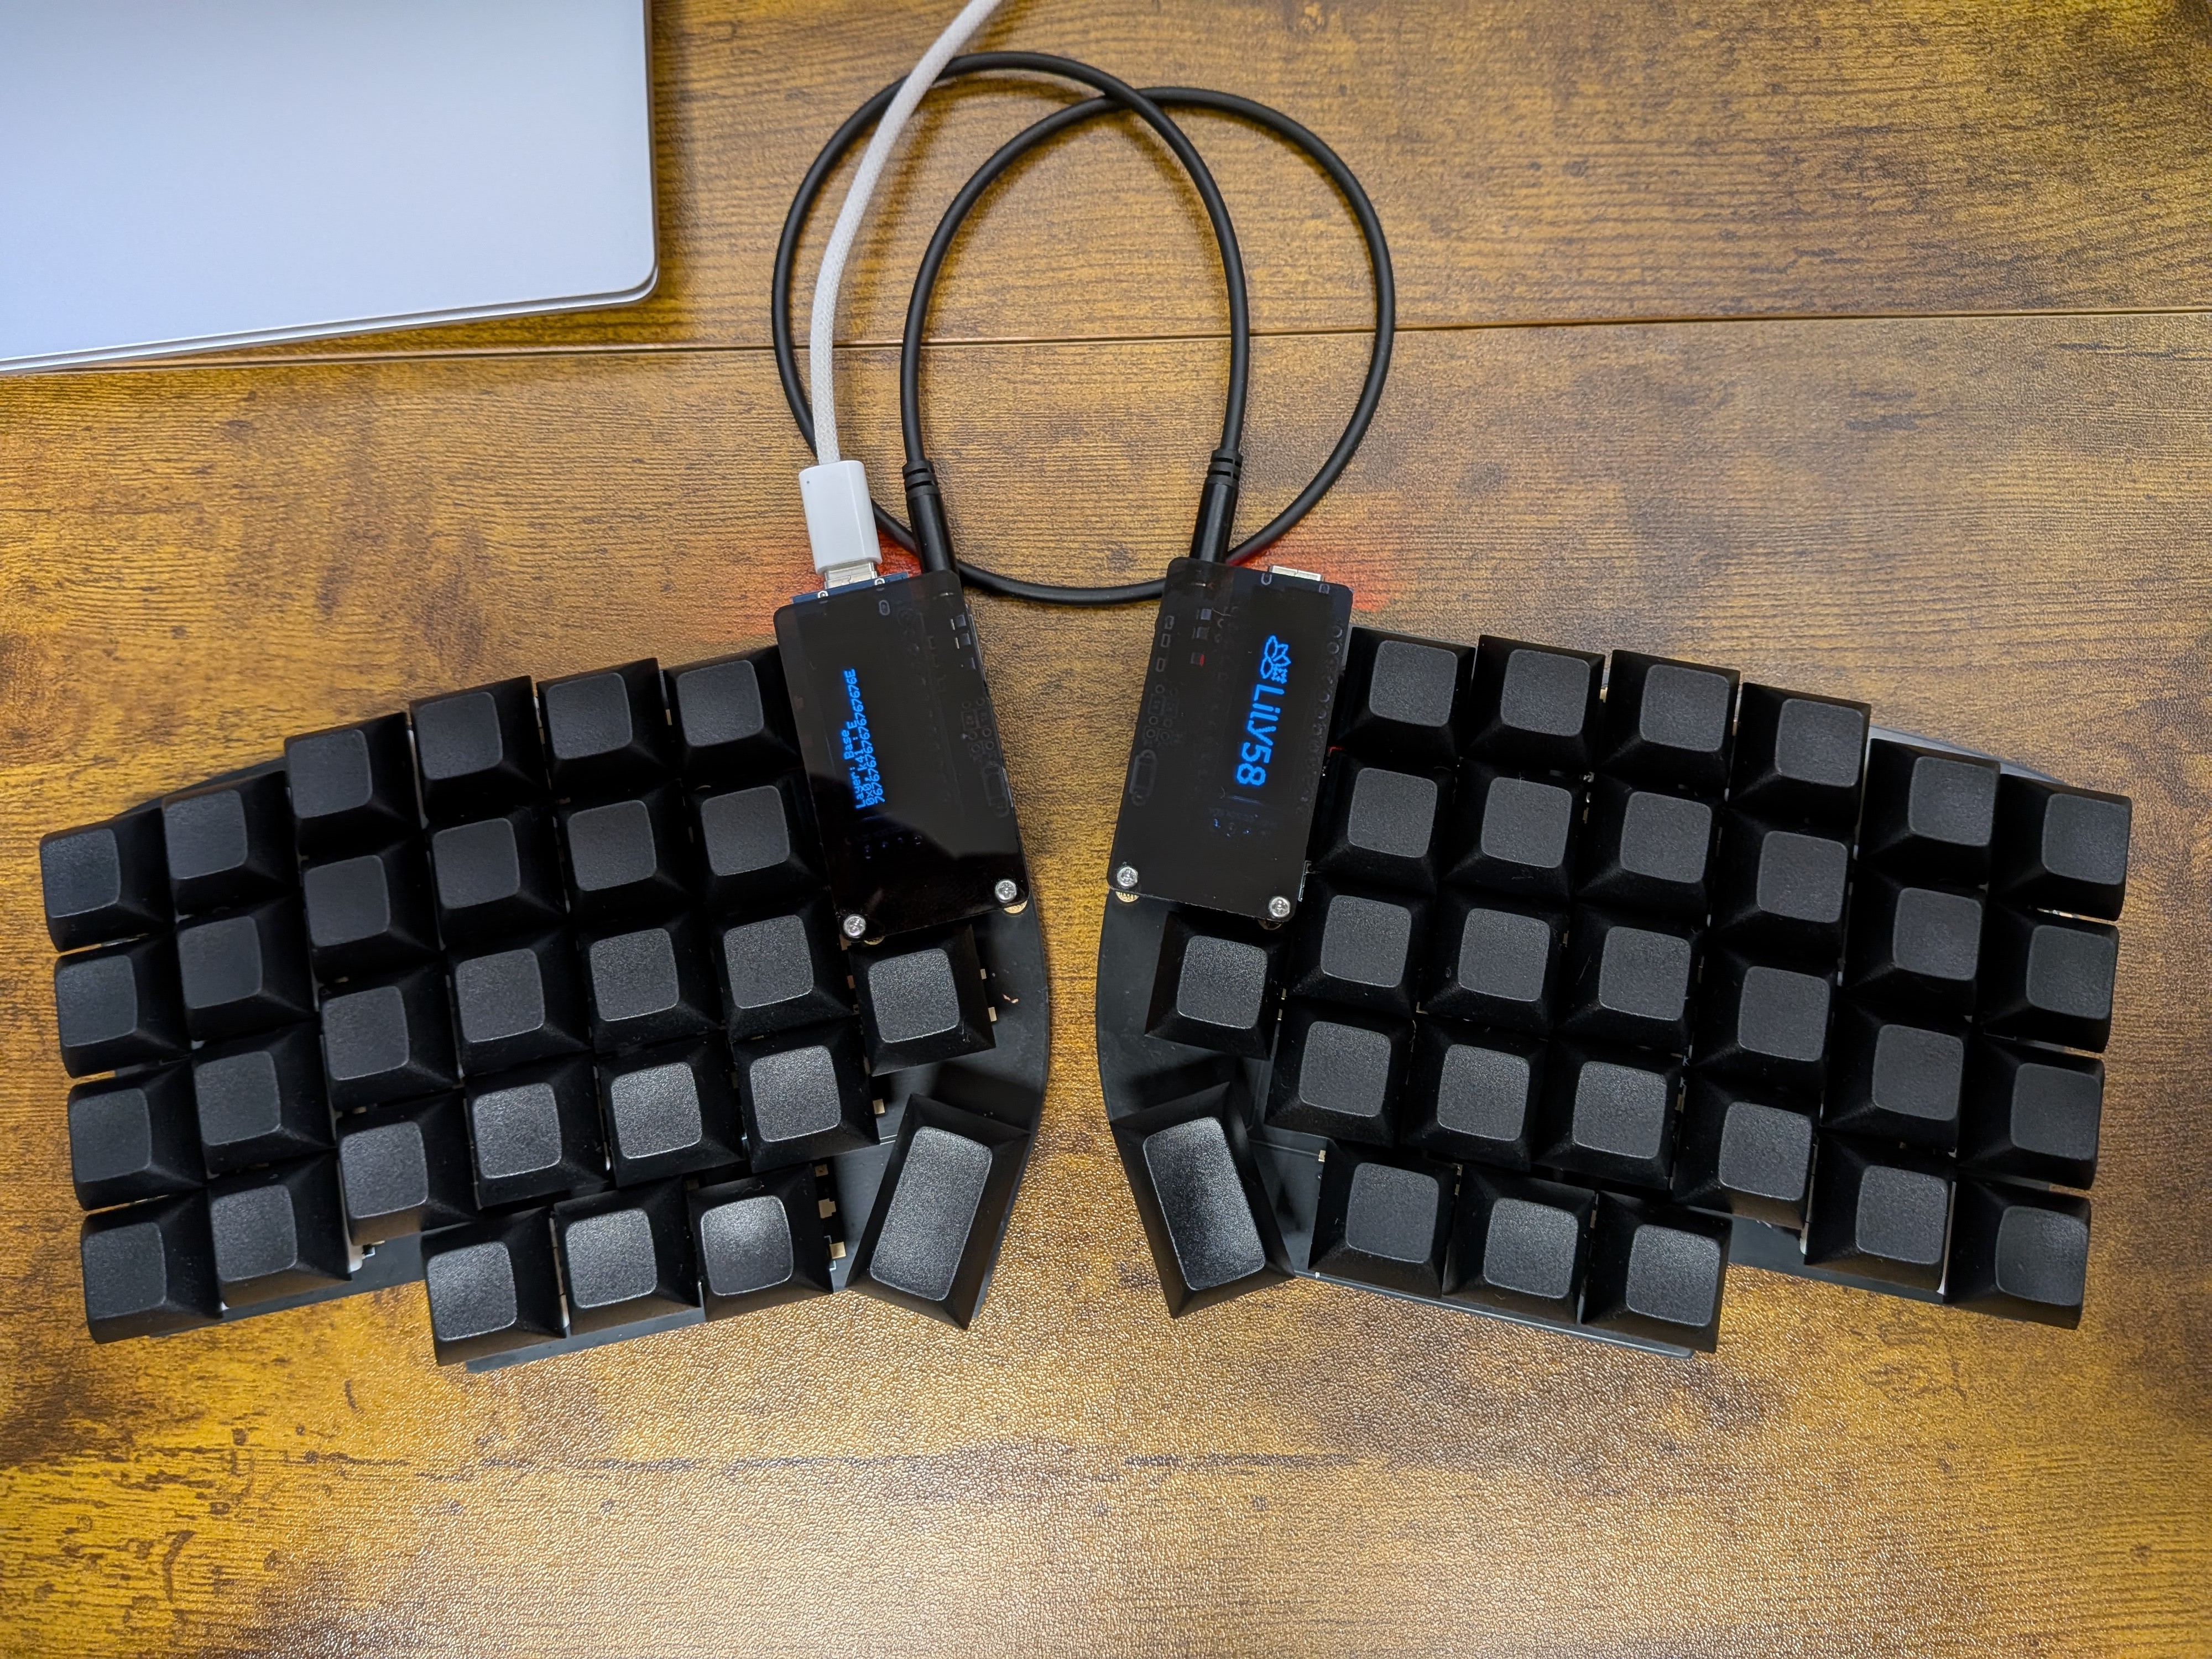
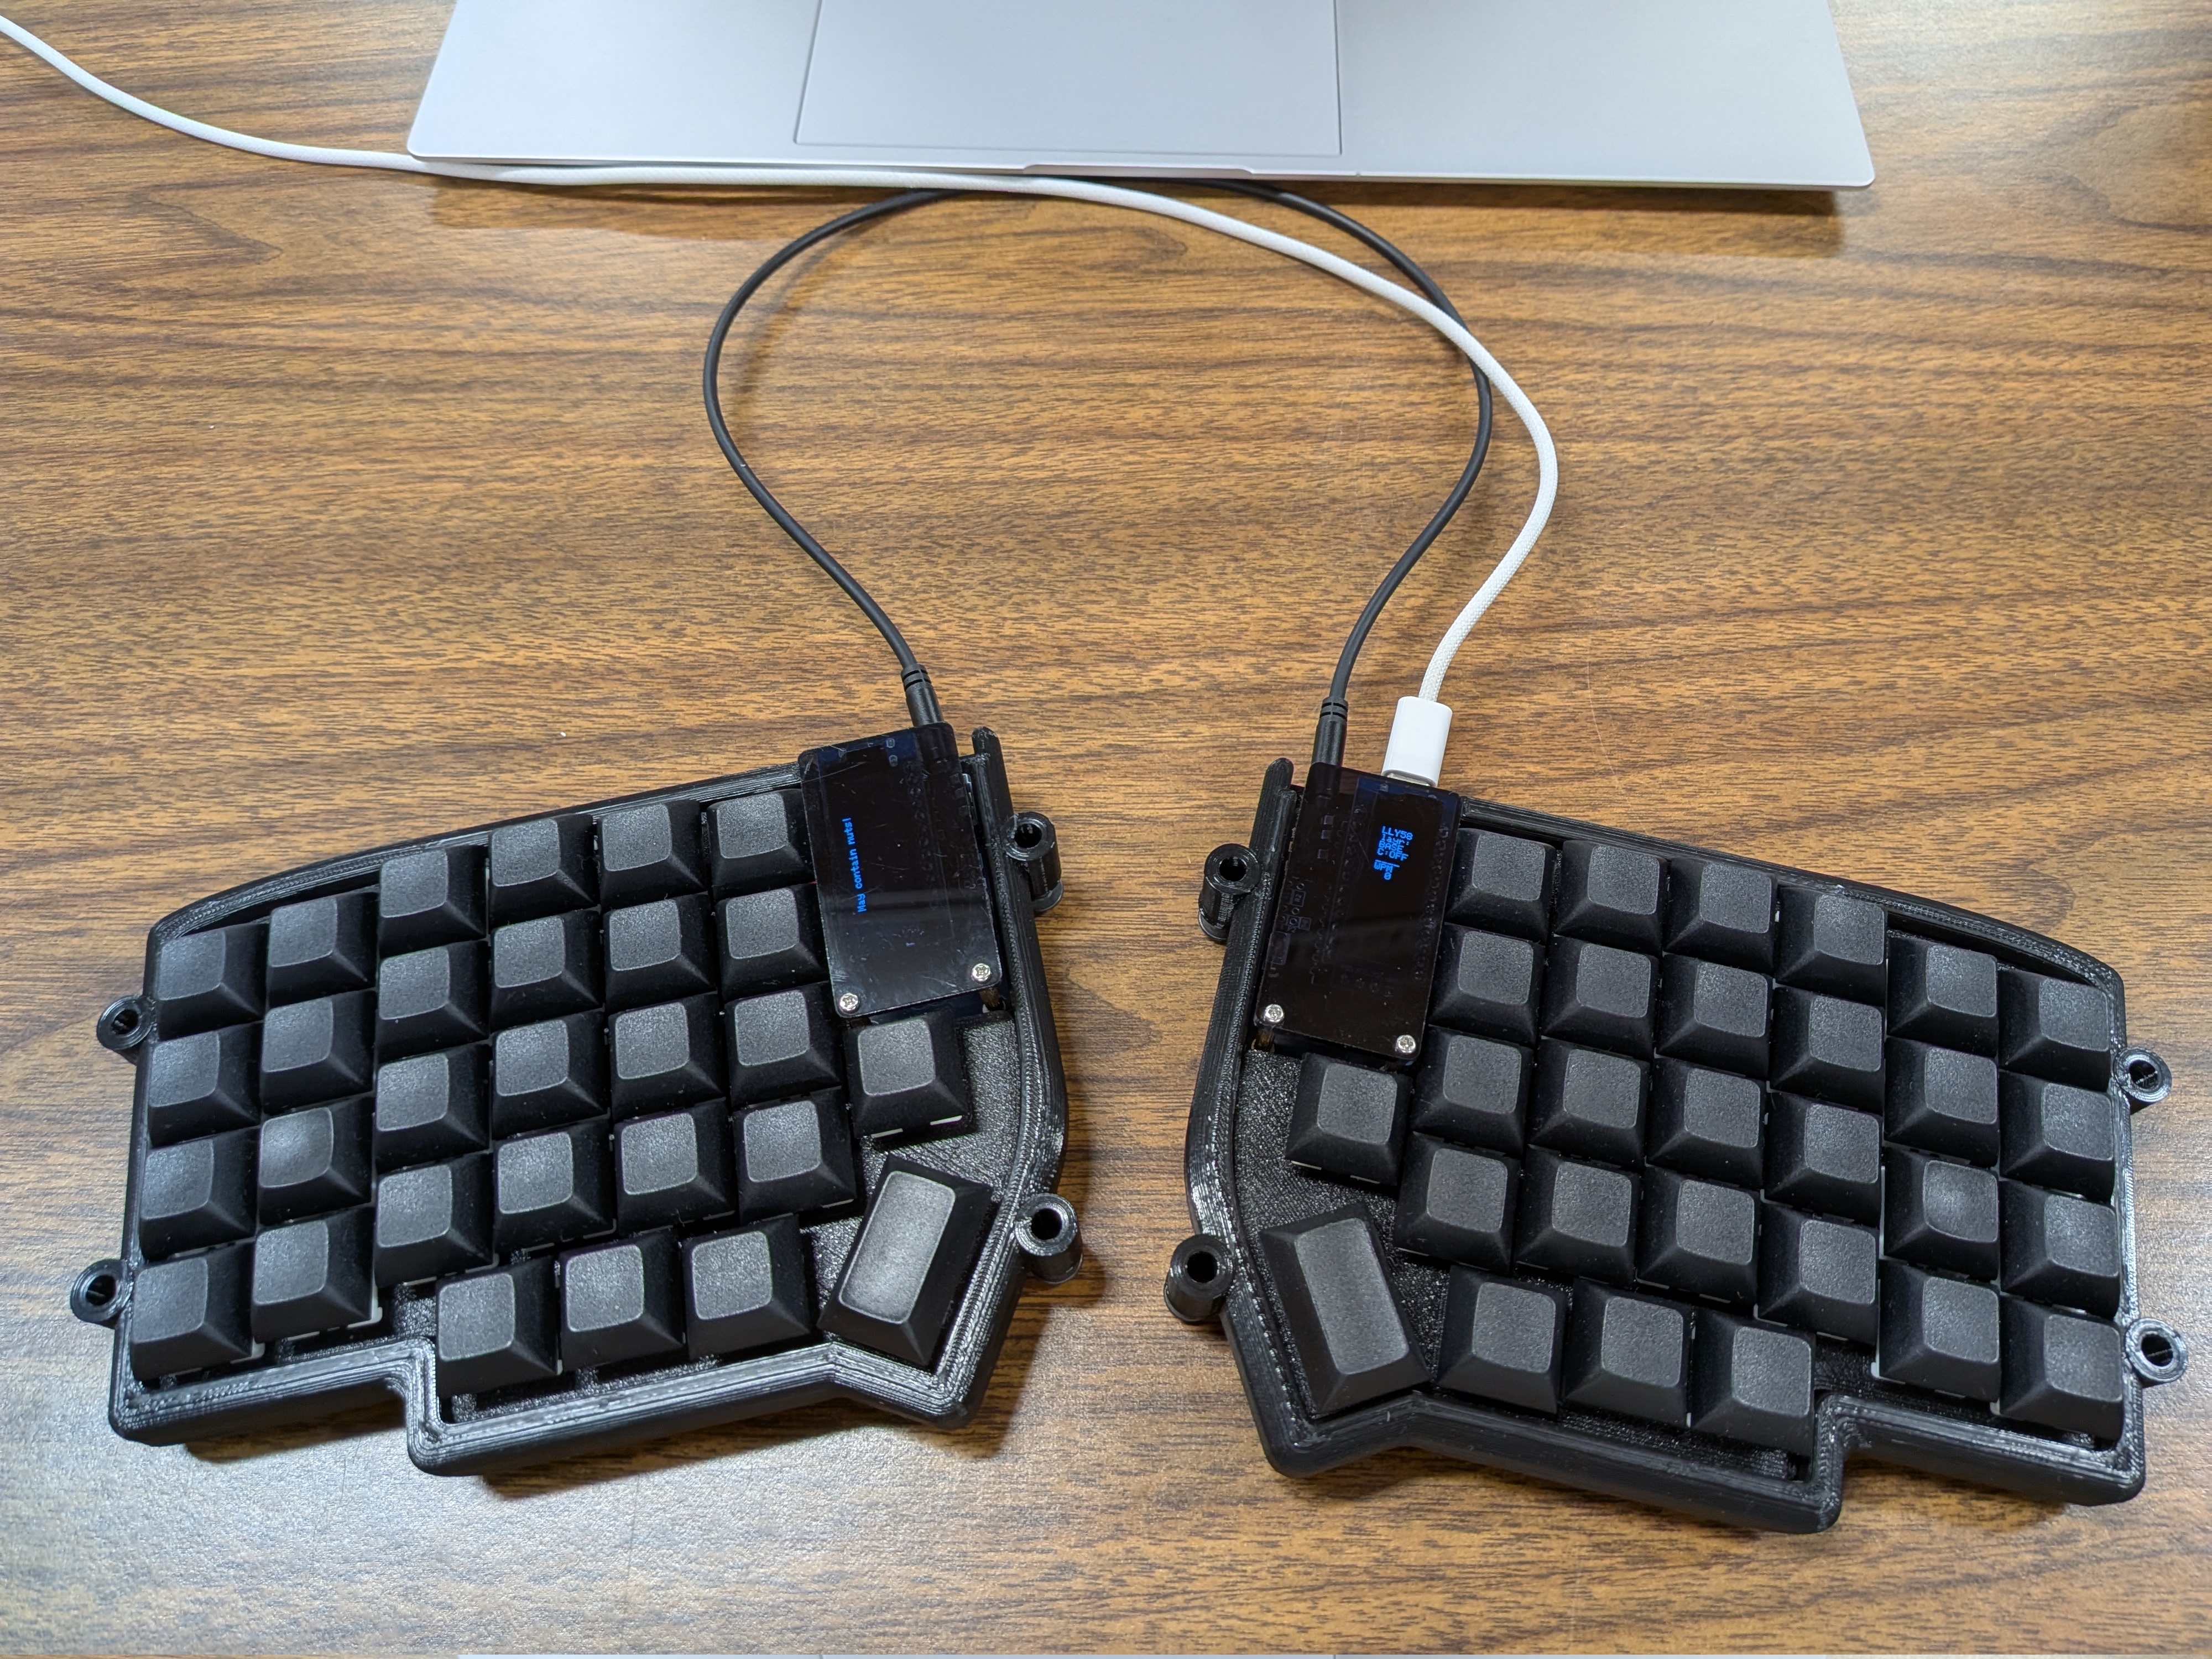
Initial build of the keyboard
The Experience
Speed
On [monkeytype], I’ve typed 100-110 words per minute on a traditional keyboard. In the few days of learning the slightly new layout, I went from an initial 20WPM to about 50WPM. With a few weeks of practice, I anticipate to return to full proficiency as earlier.
Learning
I found keybr as a very useful tool to learn a few keys at a time, raising my speed by 30-40WPM in the first few days. Prioritizing accuracy over WPM certainly helped me the most here! It’s also worth mentioning that I find myself using the correct home-row fingers much more, instead of cheating and deviating from the ideal hand position.
Style Points
While a personal preference, there is something to be said about the 3D-printed, monochrome, blank-keycap build! It even retains the ability to tent with some M5 screws bought from Ace Hardware!
Ergonomics
I feel it’s too early to call for sure, but my shoulders definitely feel more “free”. I plan to play around with the height settings and potentially add wrist rests as well.
Conclusion
This build was certainly educational in terms of soldering and 3D printing. I started as a complete newbie, and while I’d still call myself that in both, the familiarity I picked up was certainly valuable, and I got a custom keyboard as a result. Give the linked articles a read and consider an alternate layout for yourself!
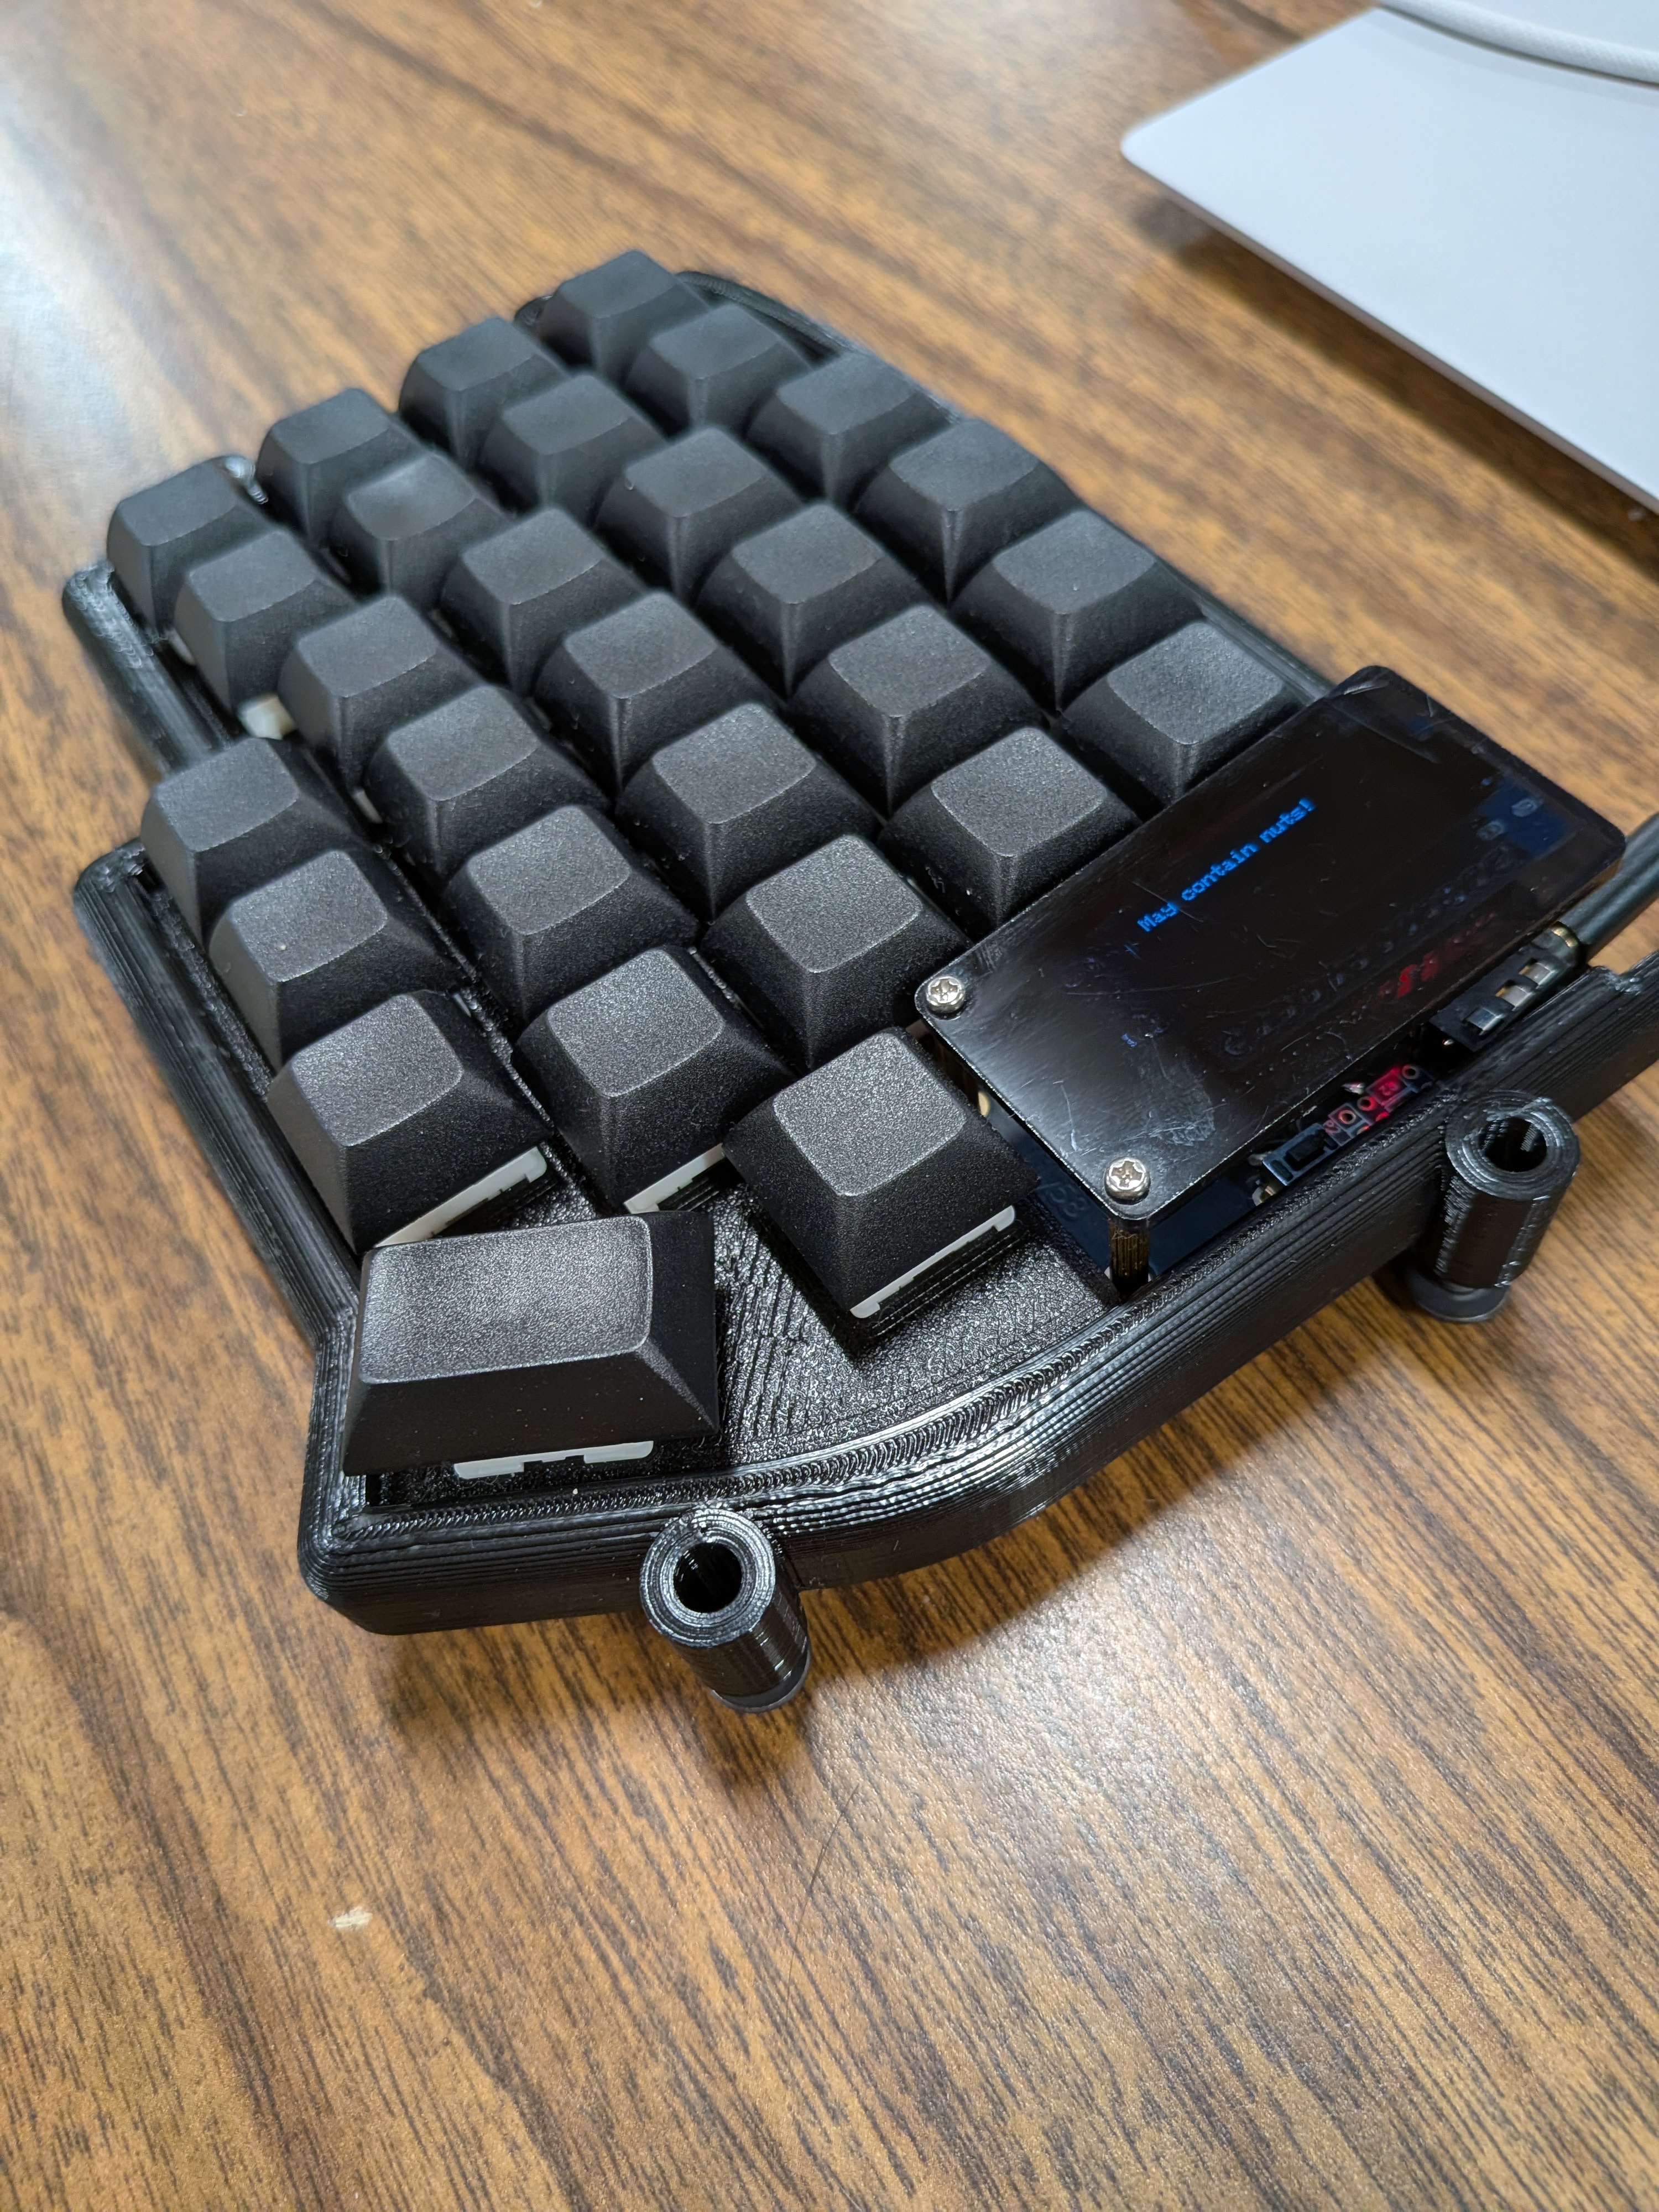
Left Side
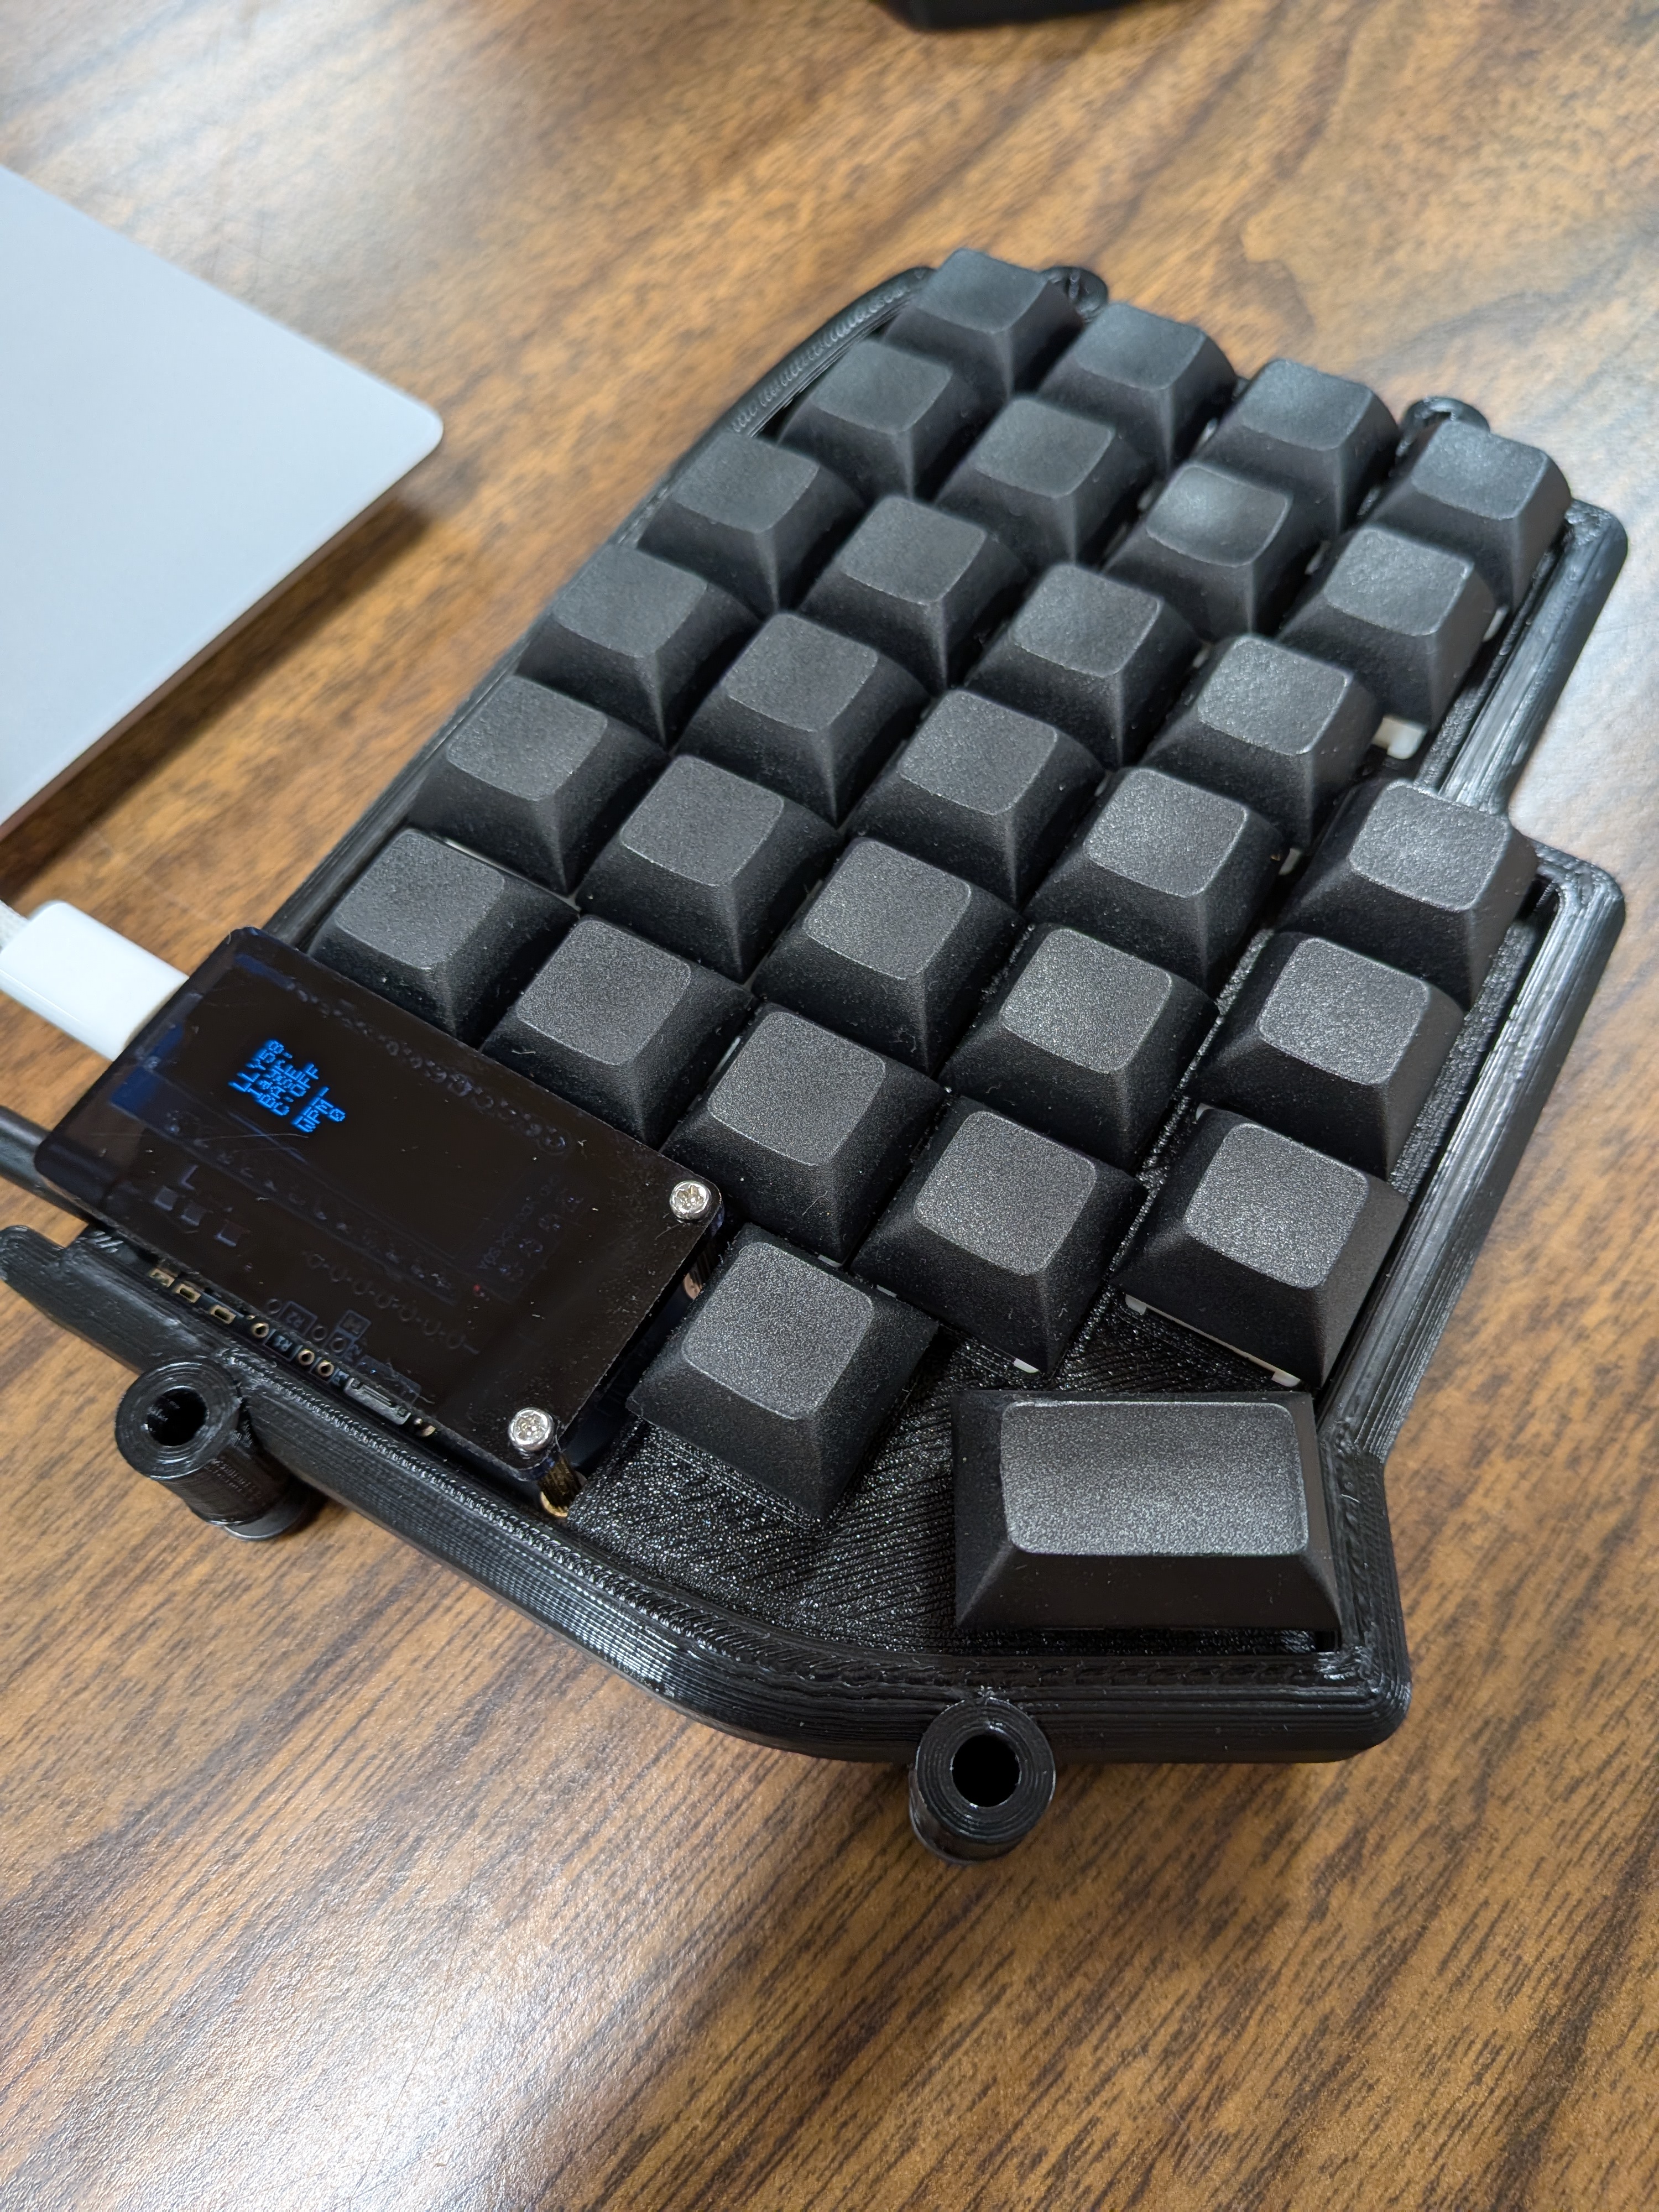
Right Side